During development embedded systems often go wrong. At times, it is difficult to know which component is not working. I myself have faced these problems and have learnt somethings the hard way. A recent tweet by Patrick inspired me to write about my experience.
I have been working on an embedded systems projects for the first time for a past month or so, and I have a few tricks to share.
Scenario: I have two machines which should communicate with each other through a serial port (RS232). However, it doesn’t work.
Loopback Tests
Now, I need to ensure that each component is working. So, I use the “Loopback test” at each step of the communication link. In a loopback test, signal is sent from the Tx pin and (looped back) received on the Rx pin of the same component in order to verify if the communication is healthy so far. The first component on which it fails is the kink in our chain.
Necessary Software
On Windows: Hyperterminal can be used to perform loopback test.
On Linux and OSX: minicom is the preferred way to perform loopback test on Raspberry Pi and other *-nix systems.
Running the Test
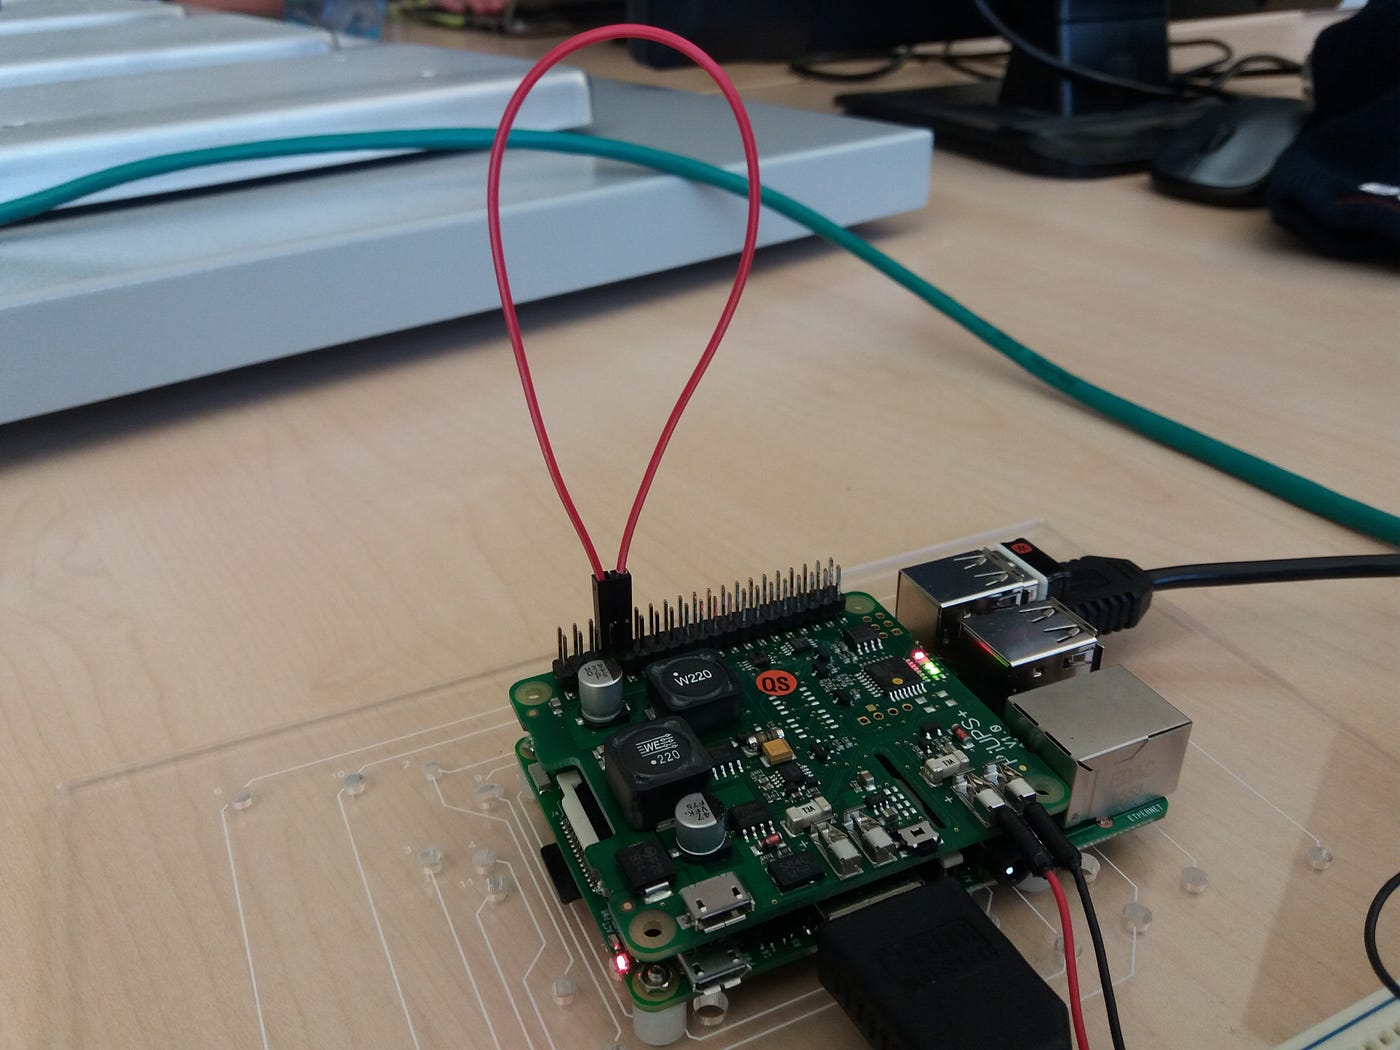
Testing Serial Port of Raspberry Pi: As shown in the figure below, short the UART pins 8 and 10 (TxD and RxD).
Run minicom on the serial port using the following command:
sudo minicom -D /dev/ttyS0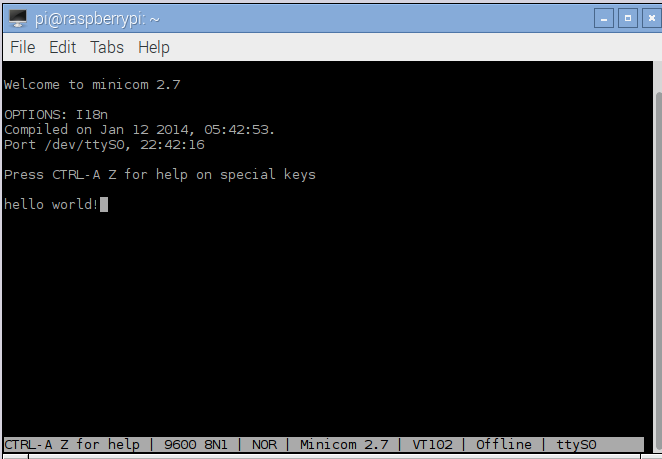
You should be able to see the content you type (“hello world!”) if the transmission actually happens. Make sure that echo is disabled, otherwise you will see each character you type twice.
Testing USB-RS232 serial converter: A USB-serial converter can be checked for faults by shorting pins 2 and 3 (Rx-Tx) of the DB9.

USB end of the converter is attached to your RPi or computer. You may need to install drivers for the converter. It should show up as COMn on Windows and as /dev/ttyUSBn (n can be any number).
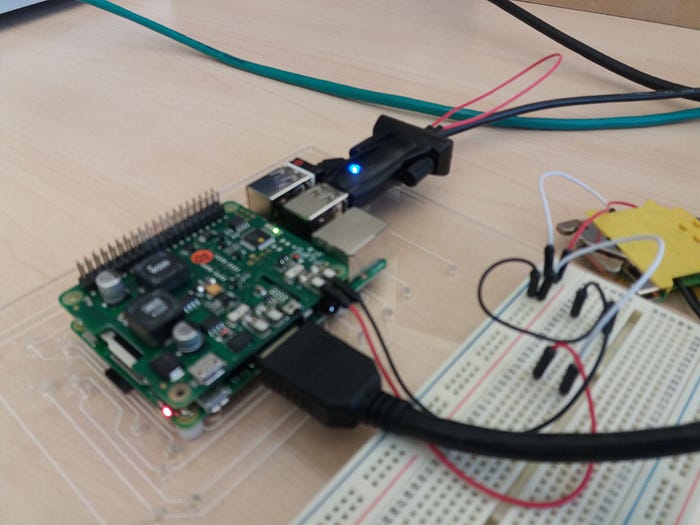
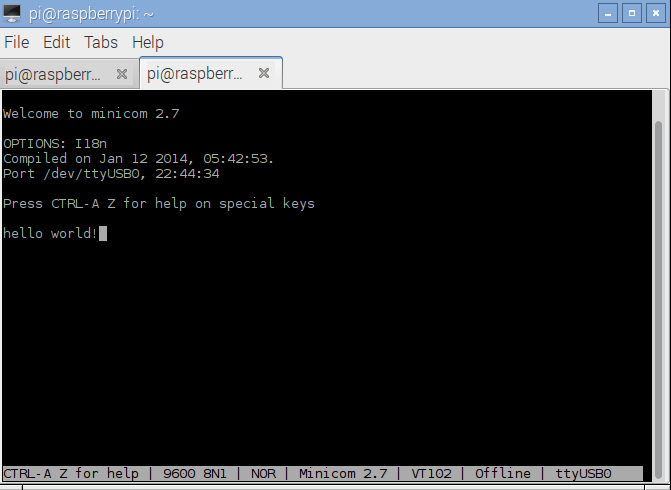
Pointing minicom to USB serial port ttyUSB0 will verify whether the USB-serial converter is working.
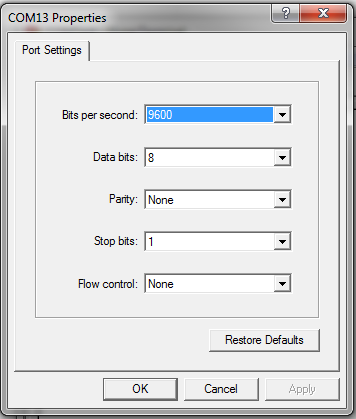
On a Windows system, the same test can be done using Hyperterminal. Ensure that the port settings are correct.
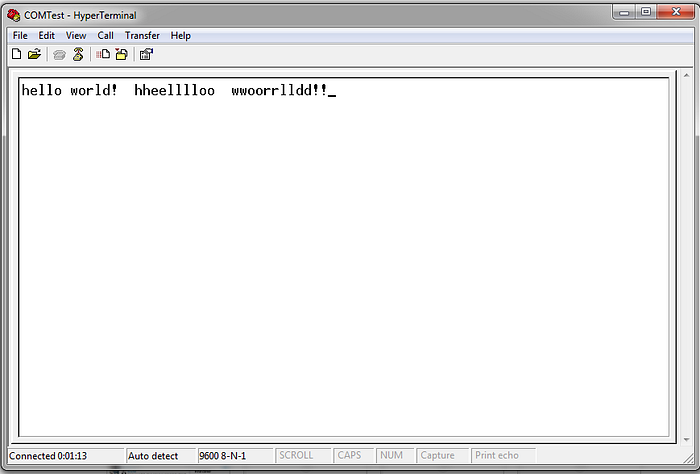
If echo is disabled, then we should see the content once. The picture below ensures that our USB-serial converter is working as it reproduces what we type.

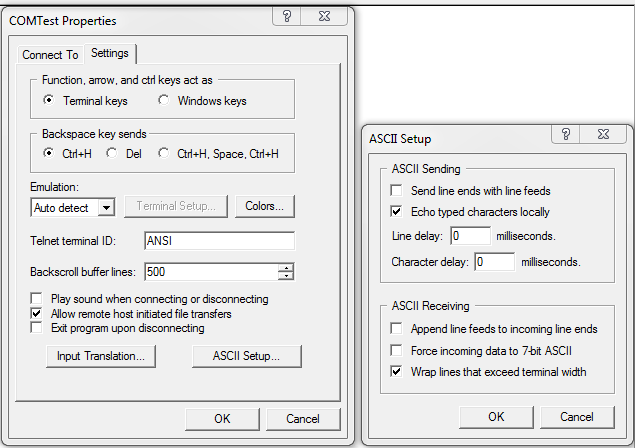
Echo can be enabled by changing the Properties ➔ Settings ➔ ASCII Setup ➔ “Echo typed characters locally”
Once echo is enabled, we should see the characters which we type twice. The next image shows both outputs with echo disabled in the first case and then with echo enabled.
What’s Next
In the next post, I will share debugging of serial ports using sniffers.